
It has been a while since I posted about the Raspberry Pi Zero, PaPiRus and GPS logger.
Since the post I've updated further with a web service for displaying routes with Google maps. I actually use this GPS logger a lot when I'm out and about walking. This means I'm keeping it up-to-date for my own use, which I hope others also find useful.
I could represent the routes on the e-ink screen directly, but a squiggly line on a small screen just isn't going to be as good as a plot on a proper mapping service. All the important questions asked in the pub at the end of a walk are answered on the device screen, such as how far you've gone, for how long and the pace. The map plots are good for recalling an old route or recalling the point you go lost.
Check out the previous post with details on the original build.
All code can be cloned from GitHub at https://github.com/AidanHolmes/gpstracker
My implementation uses the original Pi Zero without the wireless or bluetooth from the W version. A wireless Zero makes connection to the web interface much more straight forward, but be aware of security implications running on public WiFi.
Mapping GPS Routes
All logs are stored on the SD card and read by the web interface.
From the main screen the stored routes are listed with summary info. Summary information is built on this screen so it can take a bit of time to show as log files do not yet save this summary info in the logs.
 |
| Root view of all logs |
Clicking on a stored route takes you to the Google Map screen and shows a plot of where you went.
 |
| Single route - Helvellyn Walk |
Here's an example of a walk up Helvellyn in Cumbria.
Clicking on the start icon for any route shows distance and time.
Multiple routes are also shown on the map.
 |
| Multi-route GPS log |
This is example of a log which contained 2 routes. Different colours are used and the start-end markers have different numbers.
A single log can hold multiple routes when the log button is pressed and held to start and stop logging.
Implementation
Python Flask is used to display the web service from the Pi Zero. It keeps things fairly small and simple.
A Google Maps API key is required. They are free to register one so if you are using my code then add to config.py your own key. For example:
webconfig = {
'interface' : '0.0.0.0',
'port' : 80,
'googlekey' : 'BBffSyUUP6agt11EblRT-123sdddFFAD'
}
Start the web interface
> python gpstracker/web.py
Access the root web page of your Raspberry Pi by entering the IP address into your browser.
Logs are read from the logdir location as specified in config.py.
Read the web.py code for an example of how the TrackerGPS object is used to read data from a log file.
To get data from a file into an instance of TrackerGPS, each log line (JSON) needs feeding into a data entry with a call to data.gps_serial_data. Once the data is loaded it can be commited to as an entry with a call to data.commit_data(). Loop around to load all lines and then the TrackerGPS object can be queried for summary data.
Alternatively a log file can be read with a call to readsessionlog(openfile, filterrecords=filt). This reads the log and returns an array of the GPSSummary objects, with one for each session.
Enabling Ethernet Gadget on a Zero
The Pi Zero with its Gadget USB feature is awesome to hook up to a PC and extend the features with a web interface. Note that the non-zero Pis up to the Pi 3 do not have a gadget USB and this will not work.
Simply add the following to your /boot/cmdline.txt and it will function as a network device in Windows when plugged into the USB port.
modules-load=dwc2,g_ether
For full instructions check out the latest configuration requirements with a quick Google search.
Adafruit have a tutorial here.
Connection sharing
RNDIS devices on a Windows OS are a bit tricky to get working first time. Connection sharing must be enabled to allow the Raspberry Pi to connect through to Google Maps.
Plugging in the USB will not immediately grant a IP address to the Raspberry Pi. It can take a few minutes for the Pi to acquire a new address. On top of this Windows sometimes need persuasion by disabling and re-enabling the connection sharing to the RNDIS device
Run Ifconfig on your Raspberry Pi to check you have a routable IP address in the 192.168.x.x subnet.
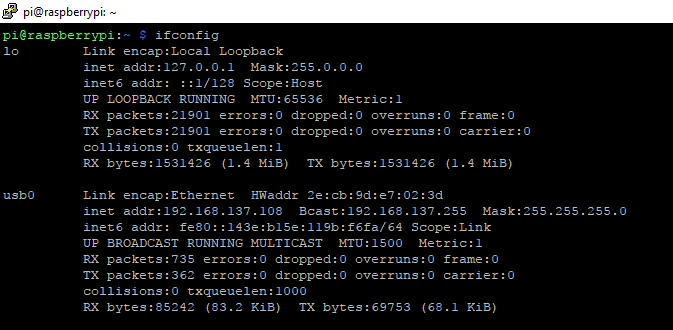 |
| Routable IP network address |